 How to Create a Shopify Store: A Step-by-Step Guide to Building Your Online Business
In the age of e-commerce, setting up an online store has never been easier. Shopify, one of the most popular e-commerce platforms, allows entrepreneurs to build, customize, and manage their online stores efficiently. Whether you’re selling products locally or globally, Shopify provides a comprehensive set of tools to make your store a success. In this guide, we’ll take you through everything you need to know to create your Shopify store from scratch.
What is Shopify?
Shopify is an all-in-one e-commerce platform that allows businesses to create, manage, and scale their online stores. It offers a wide range of customizable themes, integrated payment gateways, and marketing tools. Shopify is user-friendly, even for beginners, which makes it one of the best options for anyone looking to launch an online store quickly.
- Why Choose Shopify for Your Online Store?
Ease of Use
Shopify’s intuitive drag-and-drop interface makes it easy for anyone—regardless of technical expertise—to create an online store. You don’t need to be a web developer to set up a fully functional store. - Customization Options
With Shopify, you can customize your store’s look and feel to match your brand. Choose from free and paid themes, and use the customization tools to adjust everything from fonts to layout. - Comprehensive E-commerce Tools
Shopify offers everything you need to run your business, including inventory management, customer tracking, order fulfillment, and reporting tools. Plus, with the Shopify App Store, you can add extra features as your business grows. - SEO and Marketing Features
Shopify is designed with SEO best practices in mind. It comes with built-in tools to help optimize your content, making it easier for search engines like Google to index your site. Additionally, Shopify integrates with various marketing tools for email campaigns, social media advertising, and more. - Payment Integration
Shopify supports a wide variety of payment options, including credit cards, PayPal, Shopify Payments, and third-party gateways like Stripe. This gives your customers flexibility and makes it easy for you to accept payments globally.
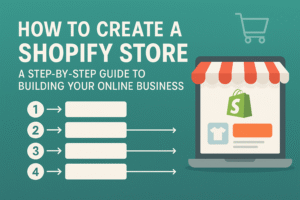
Step-by-Step Guide to Creating Your Shopify Store
Step 1: Sign Up for Shopify
- Go to Shopify and click on Start Free Trial.
- Enter your email address, store name, and password.
- After signing up, you will be redirected to your store’s admin dashboard.
Tip: Choose a unique and memorable store name that aligns with your brand’s mission and products.
Step 2: Choose and Customize Your Shopify Theme
Once you’ve signed up, the next step is to choose a theme for your store. Shopify offers both free and paid themes, all of which are mobile-responsive and customizable.
- Go to Online Store > Themes in your Shopify admin.
- Browse through the available themes and select one that fits your brand.
- Once you’ve selected a theme, click Customize to start modifying it. You can change:
- Colors and fonts
- Layout and navigation
- Homepage and product page designs
Tip: Make sure the theme you choose reflects your brand identity and provides a good user experience. A clean, modern design will encourage visitors to stay longer.
Step 3: Add Products to Your Shopify Store
Now it’s time to add your products. For each product, you’ll need to include key information, such as name, description, price, and images.
- In your Shopify admin, go to Products > Add Product.
- Fill out the following information:
- Title: Give your product a clear and descriptive title.
- Description: Write a compelling product description with keywords to help it rank on search engines.
- Images: Upload high-quality product images that showcase your items from different angles.
- Price: Set your product’s price and offer any discounts if applicable.
- Inventory: Set stock levels and SKU codes if needed.
- Shipping: Set the weight and shipping details.
Tip: Use high-quality, professional images for your products. Clear images increase the likelihood of a sale.
Step 4: Set Up Payment Methods
Setting up payment gateways is crucial for processing transactions on your Shopify store. Shopify supports a variety of payment methods, including:
- Shopify Payments (Shopify’s own payment gateway)
- PayPal and other third-party gateways (Stripe, Authorize.Net, etc.)
- Go to Settings > Payments in your Shopify admin.
- Choose a payment provider and follow the setup instructions.
- If you’re using Shopify Payments, enable it for seamless integration with your store.
Tip: If you plan on accepting international payments, make sure to enable multiple currencies and configure taxes accordingly.
Step 5: Set Up Shipping and Taxes
Next, you’ll need to set up shipping rates and tax settings.
- Go to Settings > Shipping and Delivery.
- Set up shipping zones, rates, and carriers. You can offer free shipping, flat-rate shipping, or calculated shipping based on weight or price.
- Under Settings > Taxes, configure your store’s tax settings. Shopify will automatically calculate tax rates based on the customer’s location.
Tip: Keep your shipping rates clear and simple to avoid confusing your customers. You can also use Shopify’s Shopify Shipping to print shipping labels and get discounted rates.
Step 6: Create Legal Pages for Your Store
Legal pages are essential for building trust and ensuring your store is compliant with laws.
Go to Settings > Legal.
Shopify generates default templates for the following pages:
- Refund Policy
- Privacy Policy
- Terms of Service
Customize these pages to suit your business. Make sure to include clear refund policies, data protection measures, and customer rights.
Step 7: Customize Your Domain Name
By default, your Shopify store will have a domain like yourstorename.myshopify.com. While this is fine for testing, it’s important to have a custom domain to build your brand’s credibility.
- Go to Online Store > Domains.
- You can either buy a new domain through Shopify or connect an existing one.
- If you choose to purchase a domain, Shopify will guide you through the process.
Tip: Keep your domain name short, relevant, and easy to remember. This will help with branding and SEO.
Step 8: Optimize Your Store for SEO
Search Engine Optimization (SEO) is crucial for getting your store noticed by search engines like Google. Shopify has built-in SEO tools, but here’s what you can do to enhance it:
- Optimize Product Descriptions: Include relevant keywords and use natural language.
- Set Meta Tags: Go to Online Store > Preferences to edit your store’s meta title and description.
- Add Alt Text to Images: Make sure every image has descriptive alt text for better SEO.
- Blog: Consider adding a blog to your store. Regularly posting relevant content can improve SEO and drive organic traffic.
Tip: Use SEO tools like Google Analytics and Google Search Console to track your store’s performance and identify areas for improvement.
Step 9: Test Your Store Before Launch
Before you go live, it’s important to test every aspect of your store:
- Preview Your Store: Review your theme, product pages, and checkout process.
- Test the Checkout: Place a test order to ensure that the payment system works smoothly.
- Mobile Optimization: Make sure your store looks great on mobile devices, as many shoppers use smartphones.
Step 10: Launch Your Store and Promote It
Once everything is set up, you can launch your store by removing the password protection:
- Go to Online Store > Preferences > Password Protection and disable the password.
- Announce your launch on social media, via email marketing, and through any other channels you use to reach your audience.
Tip: Offer special promotions or discounts to encourage first-time customers to make a purchase. This can help generate initial traffic and sales.
Conclusion: Launching Your Shopify Store for Success
Building an online store with Shopify is simple, but the key to success lies in preparation and strategy. By following this step-by-step guide, you’ll be able to create a fully functional, professional-looking online store that attracts customers and drives sales.
Remember to continue optimizing your store, engaging with your audience, and adapting to market trends. Shopify’s tools, combined with good marketing strategies, can set you on the path to e-commerce success.
Start your journey today, and watch your Shopify store grow into a successful online business.