How to Set Up Two-Factor Authentication on Your Google Account

Two-Factor Authentication (2FA) is an essential security feature that adds an extra layer of protection to your online accounts. By enabling 2FA, you’re ensuring that even if someone gets access to your password, they can’t access your account without also having access to a second form of verification. Here’s how you can set up Two-Factor Authentication for your Google account to keep your data safe and secure.
Step 1: Access Your Google Account Settings for Two-Factor Authentication
First, open your web browser and go to Google Account. If you’re not already signed in, you’ll need to enter your Google credentials.
Once you’re logged in, click on the menu option on the left-hand side and select Security.
Step 2: Locate the 2-Step Verification Option for Google Account Protection
Scroll down until you find the “Signing in to Google” section. You should see an option labeled 2-Step Verification. Click on it to start the setup process.
Step 3: Begin the Two-Factor Authentication Setup Process
Click the Get Started button, and Google will prompt you to sign in again to confirm your identity. Once you’re signed in, you’ll be directed to a page where you can choose your preferred method for receiving the second verification step.
Step 4: Choose Your Two-Factor Authentication Method
Google offers a few different options for the second layer of authentication. Here are the most common methods:
-
Text Message (SMS): Google will send a code to your phone number via text message. You will need to enter this code each time you log into your account.
-
Google Authenticator App: With this option, you can use the Google Authenticator app (or another similar app like Authy) to generate 2FA codes. This method works even if you don’t have an internet connection, which can be helpful if you’re traveling or in areas with poor service.
-
Google Prompts: If you have a mobile device signed into the same Google account, you can opt to receive Google prompts. A notification will appear on your phone asking if you’re trying to log into your account. All you need to do is approve the prompt.
Each method has its own advantages, so choose the one that fits your needs and preferences best.
Step 5: Set Up Backup Options for Google Two-Factor Authentication
It’s always a good idea to have backup options in case you lose access to your main verification method. Google offers several backup options, including:
-
Backup Codes: These are one-time-use codes that you can store somewhere safe. They are especially helpful if you lose access to your phone or authenticator app.
-
Alternate Phone Number: You can add a secondary phone number for 2FA purposes, giving you a backup in case your primary number is unavailable.
-
Authenticator App: Setting up an authenticator app can be another backup option for generating verification codes.
Step 6: Finalize the Two-Factor Authentication Setup for Google
After selecting your preferred verification methods and setting up backup options, click Turn On to enable Two-Factor Authentication for your Google account. You may be prompted to enter a verification code to confirm that everything is set up correctly.
Step 7: Test Your Two-Factor Authentication Setup
Once 2FA is enabled, it’s important to test it to ensure everything works as expected. Sign out of your Google account and try signing back in. You should be prompted for the second form of authentication—whether it’s a text message code, a Google prompt, or an authenticator app code.
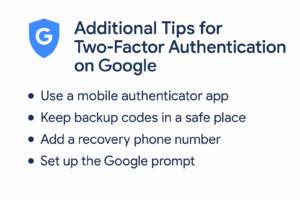
Additional Tips for Two-Factor Authentication on Google
-
Use Strong Passwords: While 2FA adds an extra layer of protection, it’s still essential to use a strong, unique password for your Google account. Avoid using easily guessable passwords like “123456” or “password.”
-
Keep Backup Codes Safe: Backup codes can be a lifesaver if you lose access to your phone or authenticator app. Make sure to store them in a secure location, such as a password manager or a physical safe.
-
Enable 2FA for Other Accounts: Consider enabling Two-Factor Authentication on other accounts, such as social media, banking, and email accounts, to further protect your personal information.
-
Review Your Two-Factor Authentication Settings Regularly: It’s a good idea to check your 2FA settings periodically, especially if you change your phone number or device. Regularly reviewing your security settings ensures that your account remains protected.
Why Should You Use Two-Factor Authentication for Your Google Account?
The importance of enabling Two-Factor Authentication cannot be overstated. With the increasing number of data breaches and cyberattacks, relying solely on a password is no longer enough to secure your accounts. Two-Factor Authentication makes it significantly harder for unauthorized users to gain access to your account.
Even if your password is compromised, the attacker would still need access to the second verification method you’ve set up (e.g., your phone or an authentication app). This added layer of security makes your account much safer.
Conclusion: Enable Two-Factor Authentication for Google and Stay Secure
Setting up Two-Factor Authentication on your Google account is a simple and effective way to protect your personal information from unauthorized access. By following the steps outlined above, you can add an extra layer of security and ensure that your Google account remains safe.
Remember to regularly review your security settings and keep your backup options up to date. By staying proactive with your online security, you can significantly reduce the risk of falling victim to cybercrime.