Add IDM Extension to Chrome Manually: A Step-by-Step Guide for 2025
If you’re looking to add IDM extension to Chrome manually, this detailed guide will walk you through the process. Adding IDM extension to Chrome manually can be necessary when Chrome fails to automatically integrate Internet Download Manager (IDM) after updates or changes in browser settings. Here’s how you can add IDM extension to Chrome manually and restore full functionality to your browser for faster downloads and enhanced file management.
Why Should You Add IDM Extension to Chrome Manually?
Internet Download Manager (IDM) is a robust tool designed to enhance your download experience by significantly increasing download speeds, organizing files, and supporting batch downloads. It seamlessly integrates with most browsers, including Chrome. However, sometimes, after Chrome updates, the IDM extension may not appear automatically.
In such cases, knowing how to add IDM extension to Chrome manually becomes essential. Manually installing the extension ensures that you can continue to enjoy all the benefits of IDM, such as automatic download detection, scheduling downloads, and managing large files effectively.
Step 1: Ensure IDM is Installed on Your PC
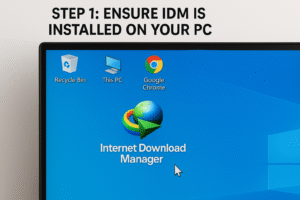
Before you add IDM extension to Chrome manually, ensure Internet Download Manager is already installed on your computer. Here’s how you can make sure:
-
Download IDM:
-
Visit the official Internet Download Manager website to download the latest version compatible with your system.
-
Run the installer and follow the setup instructions to complete the installation.
-
-
Check Automatic Integration:
-
Typically, IDM integrates automatically with Chrome after installation. If not, follow the steps below to add IDM extension to Chrome manually.
-
Step 2: Access Chrome Extensions Page
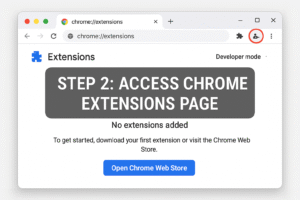
Now that you have IDM installed, it’s time to add the IDM extension to Chrome manually. To do this, follow these steps:
-
Open Google Chrome:
-
Launch Google Chrome on your computer.
-
-
Navigate to Extensions:
-
Click on the three vertical dots in the upper-right corner of Chrome (menu icon).
-
Select More Tools > Extensions, or simply type
chrome://extensions/in the address bar and press Enter.
-
-
Enable Developer Mode:
-
Toggle the Developer Mode switch at the top-right corner of the Extensions page to ON.
-
Step 3: Locate the IDM Extension File
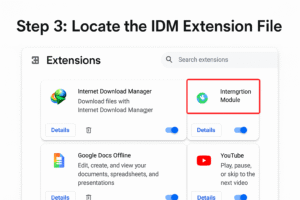
To add IDM extension to Chrome manually, you need to find the IDM extension file on your computer. Here’s where you can locate it:
-
Open File Explorer:
-
Press
Windows + Eto open File Explorer.
-
-
Locate the IDM Folder:
-
IDM is usually installed in the following directory:
-
C:\Program Files (x86)\Internet Download Manager\
-
-
Inside this folder, look for the IDMGCExt.crx file, which is the extension file needed to add IDM extension to Chrome manually.
-
Step 4: Install the IDM Extension in Chrome
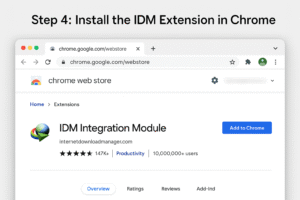
Here’s how you can add IDM extension to Chrome manually using the IDMGCExt.crx file:
-
Drag the CRX File:
-
Drag the IDMGCExt.crx file from the IDM folder and drop it directly onto the Extensions page in Chrome.
-
-
Confirm Installation:
-
A pop-up window will appear asking if you want to add the extension. Click Add Extension to confirm.
-
-
IDM Extension Installed:
-
The IDM extension will now be installed, and the IDM icon should appear in the upper-right corner of Chrome.
-
Step 5: Verify the IDM Extension Installation
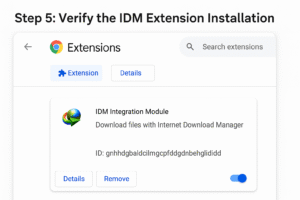
Once you’ve successfully installed the IDM extension, you need to verify that it’s functioning correctly:
-
Check for the IDM Icon:
-
After installation, the IDM icon should appear in the top-right corner of your Chrome browser. If it’s missing, navigate to
chrome://extensions/and ensure the IDM extension is enabled.
-
-
Test the Extension:
-
To confirm that the extension works, try downloading a file. IDM should automatically detect the download and prompt you to use IDM for faster downloading.
-
Step 6: Enable IDM Integration with Chrome
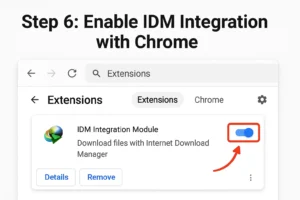
If IDM is not detecting downloads after installation, you may need to enable Chrome integration within IDM manually.
-
Open IDM:
-
Launch Internet Download Manager on your computer.
-
-
Go to IDM Options:
-
Click on Downloads in IDM and select Options.
-
-
Enable Chrome Integration:
-
Under the General tab, make sure that Google Chrome is selected for integration.
-
If it’s not selected, enable it and click OK to save your changes.
-
-
Restart IDM and Chrome:
-
Close and reopen both IDM and Google Chrome to ensure the integration is fully activated.
-
Troubleshooting Tips for Adding IDM Extension to Chrome Manually
Even after adding the IDM extension to Chrome manually, you may encounter some issues. Here are some troubleshooting steps to fix common problems:
-
IDM Icon Not Showing:
-
If the IDM icon doesn’t appear, try restarting both IDM and Google Chrome. Make sure the extension is enabled on the Extensions page (
chrome://extensions/).
-
-
IDM Not Detecting Downloads:
-
Go to IDM Options > General and ensure that Chrome integration is enabled. If it’s already enabled, disable it and then re-enable it.
-
-
Extension Stops Working After Chrome Update:
-
Sometimes, Chrome updates can cause the extension to stop working. In this case, reinstall the extension by repeating the steps to add the IDM extension to Chrome manually.
-
Why Add IDM Extension to Chrome Manually?
The primary reasons to add the IDM extension to Chrome manually include:
-
Faster Downloads: IDM accelerates download speeds by splitting files into multiple parts and downloading them simultaneously.
-
Automatic Download Detection: IDM detects downloadable content and prompts you to use it for downloads.
-
Organized Downloads: IDM organizes your downloads into different categories, making file management easier.
-
Scheduled Downloads: IDM allows you to schedule downloads to start at specific times.
-
Broad File Support: IDM supports a wide range of file types including videos, documents, software, and more.
Also see: Android 16 Update: 7 Exciting New Features You Can’t Miss!
Conclusion
Knowing how to add the IDM extension to Chrome manually ensures that you can continue enjoying the full functionality of Internet Download Manager, even if Chrome fails to automatically integrate the extension. By following the simple steps outlined in this guide, you can add IDM extension to Chrome manually and resume fast, efficient, and organized downloading in 2025.
By manually adding IDM extension to Chrome, you will regain control over your downloads, increase download speeds, and make file management more efficient. With the extension installed, you’ll be able to maximize the potential of IDM and ensure that your browsing and downloading experience is seamless.
External Resources for Further Reading:
-
Official IDM Website – Download IDM and explore its features.
-
Google Chrome Extensions Help – Learn more about managing and adding extensions in Chrome.
-
IDM Help and Troubleshooting – Access official support from IDM.