Format Write-Protected Pen Drive Easily: 5 Simple Steps to Fix It
When you encounter a write-protected pen drive, it can be a frustrating experience. Write protection prevents you from adding, editing, or deleting any files on the drive, and you may find it difficult to format it as well. If you’re struggling with a write-protected pen drive, don’t worry—there are simple steps to format a write-protected pen drive and regain full access.
In this step-by-step guide, we’ll show you how to easily format a write-protected pen drive by removing write protection and completing the formatting process.
What is Write Protection on a Pen Drive?
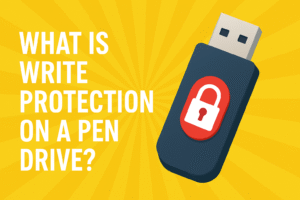
Write protection on a pen drive is a feature that prevents any modification to the contents of the drive. When write protection is enabled, you cannot add new files, delete old ones, or even format the drive. This feature is useful in preventing accidental data loss or malware infection but can be quite inconvenient when you need to modify the files or format the pen drive for fresh use.
There are several reasons why a pen drive may be write-protected, including:
- Physical switches on the drive
- Software settings in the operating system
- File system errors or corruption
Regardless of the cause, you can follow the steps outlined in this guide to format a write-protected pen drive and remove the protection.
Step 1: Check for a Physical Write-Protection Switch
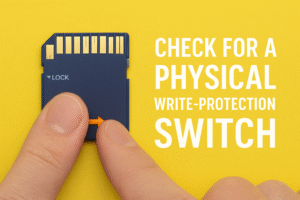
Format write-protected pen drive Before troubleshooting via software methods, it’s essential to check whether your pen drive has a physical write-protection switch. Many pen drives come with a small switch that allows you to toggle write protection on and off.
How to Check and Disable Write Protection:
- Locate the Switch: Look for a small switch on the side of your pen drive.
- Unlock the Switch: If the switch is in the locked position, slide it to the unlocked position to disable write protection.
Once you’ve unlocked the switch, reconnect the pen drive to your computer. If this doesn’t solve the issue, continue with the next steps to format the write-protected pen drive.
Step 2: Remove Write Protection Using Windows Registry
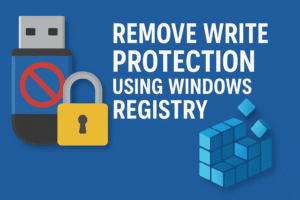
If your pen drive doesn’t have a physical switch, or if it doesn’t work, you can remove the write protection using the Windows Registry. The Windows Registry controls many aspects of the operating system, and by modifying it, you can disable write protection on your pen drive.
Steps to Remove Write Protection Using Windows Registry:
- Open the Run Dialog: Press
Win + Rto open the Run dialog box. - Launch the Registry Editor: Type
regeditand press Enter to open the Registry Editor. - Navigate to the Storage Policies Folder: Go to:
HKEY_LOCAL_MACHINE\SYSTEM\CurrentControlSet\Control - Find or Create the StorageDevicePolicies Key:
- Look for StorageDevicePolicies. If it doesn’t exist, right-click Control, select New > Key, and name it StorageDevicePolicies.
- Modify the WriteProtect Value:
- On the right pane, find the WriteProtect value. If it’s not there, create a new DWORD (32-bit) Value and name it WriteProtect.
- Right-click WriteProtect and select Modify. Change its value to 0 to disable write protection.
- Restart the Computer: Close the Registry Editor and restart your PC to apply the changes.
Once the computer restarts, the write-protected pen drive should no longer be locked, allowing you to proceed with formatting.
Learn more about Registry Editor from Microsoft for further understanding.
Step 3: Remove Write Protection Using Command Prompt
Another effective method to format a write-protected pen drive is by using the Command Prompt and the DiskPart utility. This tool allows you to manage disk partitions and attributes, including removing write protection.
Steps to Remove Write Protection Using Command Prompt:
- Open Command Prompt as Administrator:
- Press
Win + Xand select Command Prompt (Admin).
- Press
- Start DiskPart:
- Type
diskpartand press Enter to open the DiskPart tool.
- Type
- List All Disks:
- Type
list diskand press Enter to display all connected disks.
- Type
- Select Your Pen Drive:
- Identify your pen drive from the list. If it’s listed as Disk 1, for example, type:
select disk 1 - Replace
1with the correct disk number.
- Identify your pen drive from the list. If it’s listed as Disk 1, for example, type:
- Clear Write Protection:
- Type
attributes disk clear readonlyand press Enter to remove the write protection.
- Type
After completing these steps, your pen drive should no longer be write-protected, and you can now proceed to format write-protected pen drive.
Learn more about DiskPart on Microsoft.
Step 4: Format the Pen Drive
Now that you have removed the write protection, you can format write-protected pen drive. Formatting will erase all data on the drive, so be sure to back up any important files before proceeding.
Method 1: Format Using File Explorer
- Open File Explorer: Press
Win + Eto open File Explorer. - Locate Your Pen Drive: Find your pen drive under “This PC.”
- Right-Click and Format:
- Right-click on your pen drive and select Format.
- Choose the desired file system (e.g., NTFS, FAT32, or exFAT) and decide whether to perform a Quick Format or a Full Format.
- Start the Format: Click Start to begin the process.
Method 2: Format Using Disk Management
- Open Disk Management:
- Press
Win + Xand select Disk Management.
- Press
- Select Your Pen Drive: In the list of drives, right-click on your pen drive and select Format.
- Choose the File System: Select your preferred file system and click OK to format the pen drive.
Step 5: Use Third-Party Tools (If Necessary)
Format write-protected pen drive If none of the previous methods worked, you can try third-party formatting tools that specialize in USB drives. These tools are designed to help with formatting and repairing issues that may be causing write protection.
Here are a few reliable third-party tools:
-
HP USB Disk Storage Format Tool: A popular and easy-to-use tool for formatting USB drives. You can download it from here.
-
EaseUS Partition Master: A comprehensive partition manager that offers powerful formatting features. Visit EaseUS Partition Master for more details.
-
SD Formatter: A tool specifically for formatting SD cards and USB drives. Learn more about it here.
Additional Tips for Maintaining Your Pen Drive
To prevent encountering write protection issues in the future, follow these tips:
- Eject Properly: Always eject your pen drive safely to avoid file corruption.
- Scan for Viruses: Regularly scan your pen drive for malware that could cause write protection issues.
- Keep Backups: Backup important files stored on your pen drive to avoid data loss.
- Update Drivers: Ensure that your device drivers are up-to-date to avoid compatibility issues.
Also see: How to Make Your PC a WiFi Hotspot in 5 Simple Steps – Easy Guide for 2025
Conclusion
If you’re format write-protected pen drive, don’t fret—there are simple ways to format the write-protected pen drive and regain full access. Whether you use the physical write-protection switch, Windows Registry, or Command Prompt, these methods will help you remove write protection and restore functionality to your USB drive.
Remember, formatting a pen drive will erase all its data, so be sure to back up any files you want to keep. Once you’ve successfully format write-protected pen drive, you can use it again as if it were brand new!


Pingback: How Recuva Works: 5 Simple Steps to Recover Your Deleted Files » PeshawarTech | Latest Tech News, Reviews